How to choose the right backing for Custom Patches
What backing should I choose for my custom patch? How do I fasten the backing onto my preferred outfits and accessories?
At Gumtoo, we get asked these questions a lot, especially from our first-time custom patch buyers. Choosing the right type of backing is an important choice that you have to make when getting your custom patch.
To help you make the right choice for your patch order, we grilled our Custom Patch Product Specialists on the different types of backing available and which type to pick. We also asked them the best way to attach them to your garments and accessories.
Here’s what our Product Specialists came up with: A to-the-point, but comprehensive guide to backing options for custom patches.
Different types of backing options for custom patches and which one to choose:
At Gumtoo, we offer 3 main types of custom patches-custom embroidered patches, custom woven patches, and custom printed patches. For our patches, the most popular backing options are:
1. Plain Backing/No Backing:
Custom patch with plain backing/no backing showing the exposed twills
In this backing option, the back of your custom patch has no backing over the stitching. The threads and twill are exposed at the back of the patch.
How to fasten the plain backing patch on to your garment:
For a more permanent patch, you can sew the no-backing patch onto your jacket/bag/cap.
If you want to temporarily wear the patch, fasten it onto your preferred outfit with pins or clips.
When to pick plain backing for your custom patch:
Without backing, the patches are flexible and lightweight. If you want patches that can be easily dispatched and distributed in bulk, these are a good option.
Pick plain backing patches if you want to sew the patch permanently onto your garment. The patch can withstand multiple washes and will fade and fray with time, just like any other garment.
2. Iron-on Patch Backing
Custom Patch with Iron-on Backing
Iron-on patches have an adhesive heat seal which allows you to attach the patch to your garment with a standard home iron. The heat seal makes the patches stiff and flat.
How to fasten iron-on patch on to your garment:
Place the iron-on patch with the heat seal side in the desired location on your garment/bag. Cover the patch with a cotton towel. Iron the cotton towel for 1 minute with pressure. Release the iron, wait for some time and repeat the process 3 times. Avoid moving the iron from side to side, as the design may shift. Allow the patch to cool.
Turn the garment inside out and apply iron to the back of the design area for around 30 seconds.
Your iron-on patch is ready to be flaunted!
Some key things to note while using an iron-on patch
Wait up to 48 hours after you have ironed the patch on before washing the garment. Turn your garment inside out when washing for longer durability of your patch.
Iron-on patches do not work well on materials such as nylon, corduroy, and leather. For such fabrics, you can choose to sew or use fabric glue to adhere to the patch.
When to pick iron-on patch backing?
Iron-on patches are a quick and easy way to accessorize jackets, shorts, jeans, bags, and more. In under 15 minutes, you can transform the look of any outfit. It can easily be done at home and does not require any expertise. The only requirement is that you should be able to use a standard home iron.
Iron-on patches are durable and can withstand up to 25 to 30 washes easily. To make the patches more long-lasting, you can choose to additionally sew the patch edges to the garment with a few stitches.
These make great giveaways at events. You can add an illustrated step-by-step insert while packaging your patch swag.
You can also set up a quick demo station at your event for showing how the patches work and look.
3. Velcro Backing
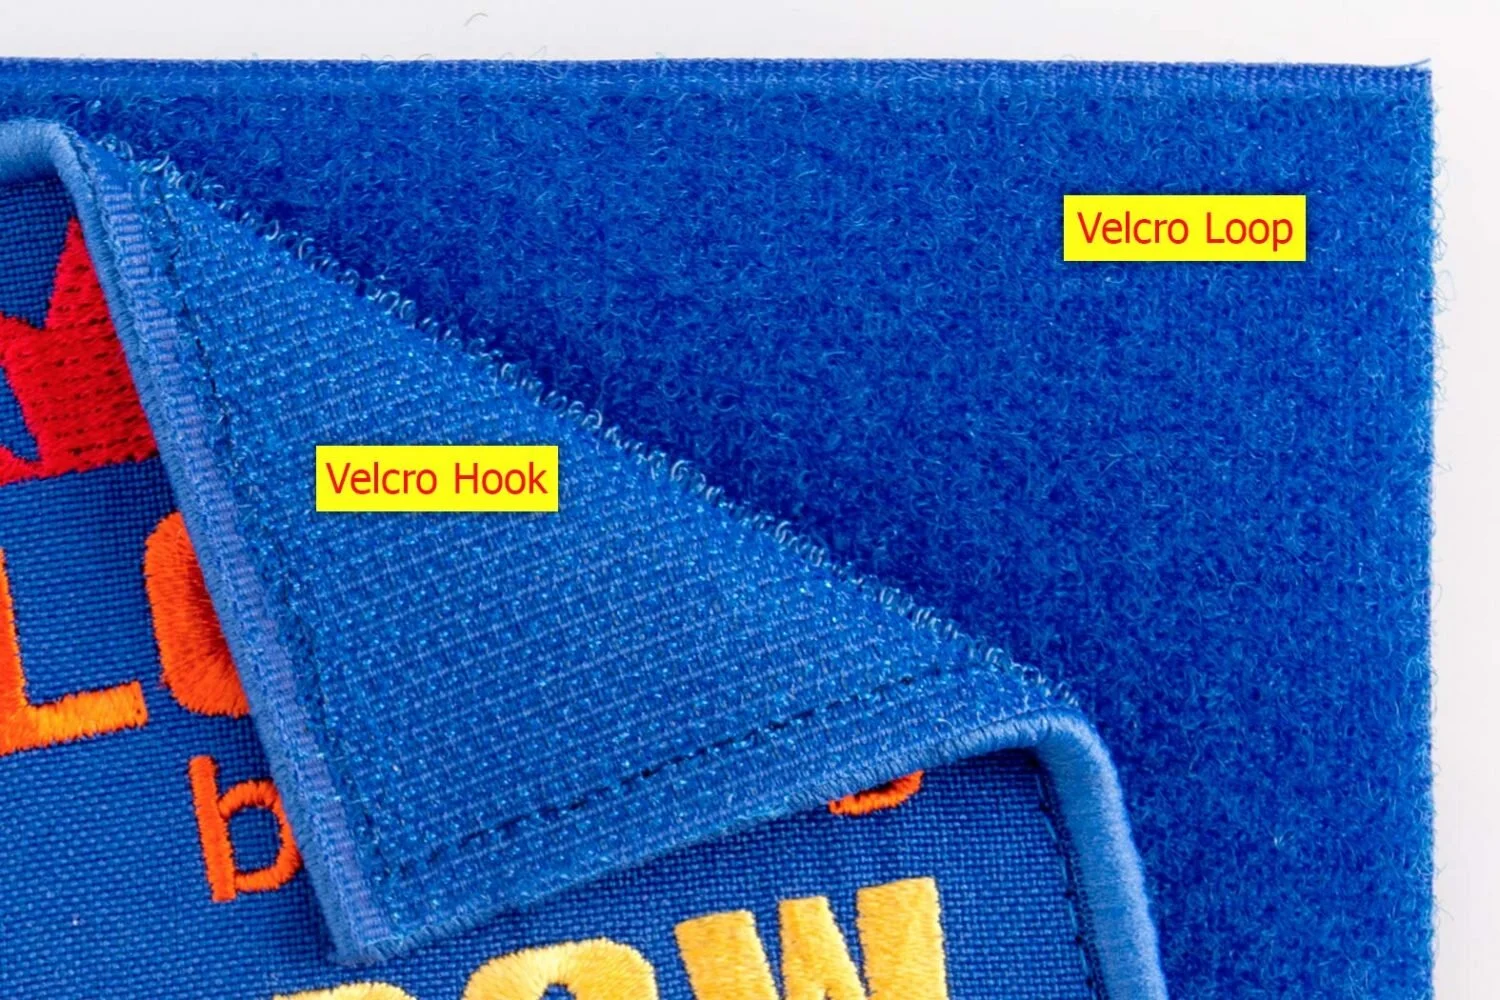
Velcro Hook and Velcro Loop on a custom patch
Image via embrosoft
Also called hook and loop backing, Velcro backing consists of two parts- the hook and the loop. The loop is to be sewn on the garment to which the patch will be adhered to. The hook is sewn onto the patch. We also provide a double-sided Velcro backing, if you don’t want the loop to be sewn.
How to attach Velcro backing patch to your garment
On a single side Velcro backing patch, you need to sew the loop to the desired location on your garment. Then affix the hook onto the loop. The patch is easy to peel off the loop, and you can affix different patches on the same loop.
On a double-sided Velcro backing patch, you can attach the loop on the garment by pressing it on the garment. Affix the hooked patch on the loop and you are ready to go.
When to pick Velcro backing patch
Velcro backing is easy to use and durable. You can peel the patch off easily whenever required and apply a new one. This backing is used chiefly by police, military, other law enforcement agencies, and boy and girl scout uniforms
Velcro backing also makes great fashion sense-you can put on and take off any number of patches easily!
Apart from these three popular types, the other types of backing available are:
4. Sticker Peel Backing

Custom Patch with Sticker Peel Backing
Image via Etsy
This type of backing works exactly like a sticker-a glue is applied to the back of your custom patch, and covered with peelable paper. The paper backing can be made to fit the shape of the patch (die-cut) or larger (kiss-cut) for easy peeling.
How to attach sticker peel backing patch to your clothes
Simply peel off the backing paper and press the patch on the desired surface. It will stick on the garment.
When to pick sticker peel backing patch?
Sticker peel backing is the easiest to use and works for all age groups. Pick this backing option when you want a temporary patch for a single event. The glue may come off within a single wash cycle in a washing machine. If not washed, the bond will weaken over time.
5. Plastic Backing
Thin plastic backing on custom patch
Image via southwestemblem
Plastic backing patches have a thin, matte plastic covering. This gives the patch rigidity and support, allowing it to maintain shape over time. Plastic backings can be used on all types and shapes of patches.
How to attach plastic backing patch onto fabric?
Plastic backing patches while rigid are thin enough to allow you to sew your patches onto fabric.
When to pick plastic backing patch?
Plastic backing patches are more durable and rigid than no backing patches. These are a great pick for durability and when you want a more permanent patch.
6. Pin Backing

Pin backing for custom patch
Image via Everest Embroidery
In this type of backing, the flat part of one or more pins is placed inside the layers of the backing, twill, and threads of the patch.
How to secure pin backing patches to your outfit?
The pins have butterfly clutches to secure the patch onto fabric, similar to a brooch.
When to pick pin backing patches?
When you want to reuse the same patch on different garments or bags, pick pin backing patches. These are also great for military, law enforcement uniforms, school uniforms, boy and girl scout uniforms, and club membership patches.
Since pin-back patches are easy to use, they make great swag.
7. Button Loop Backing
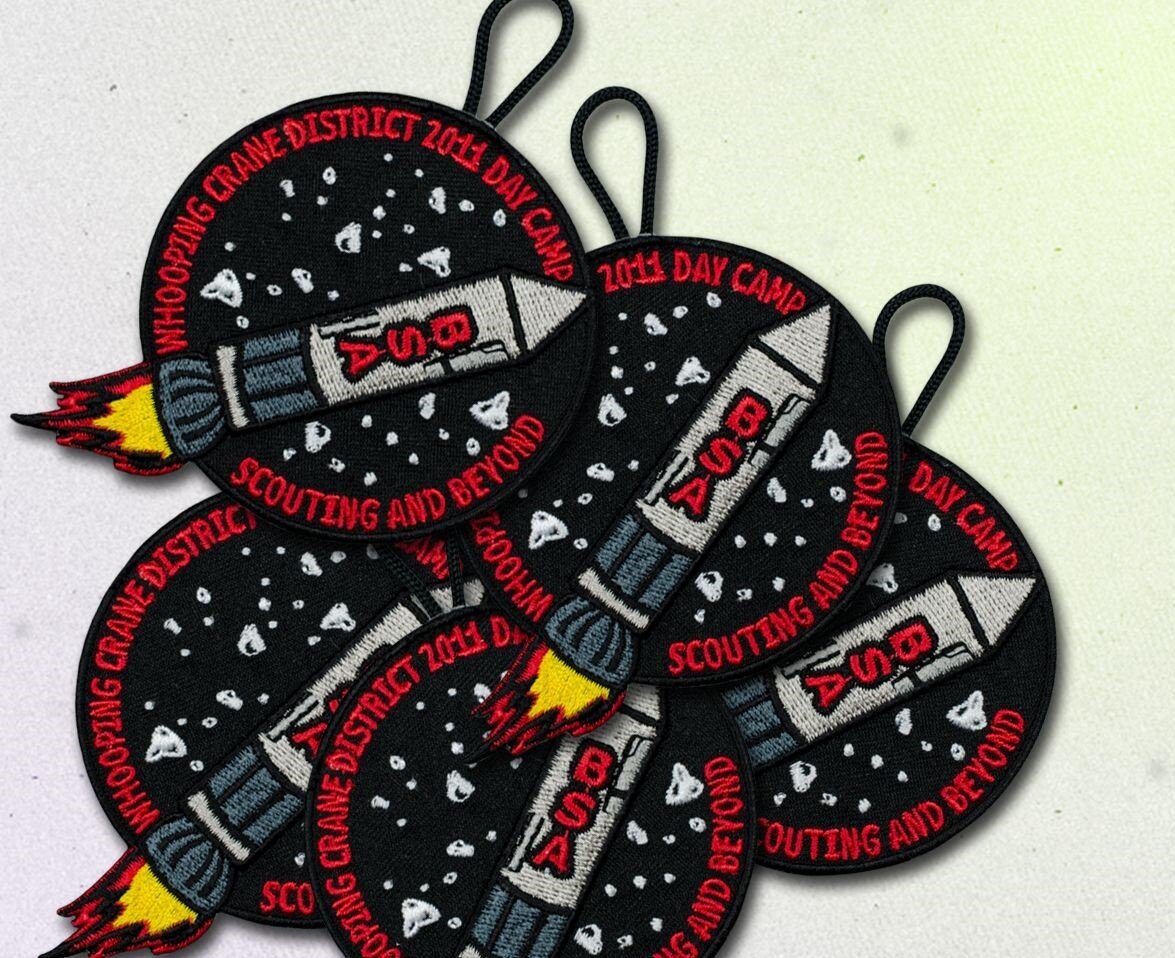
Custom Patches with button loop backing
Image via Pinterest
The back of the patch has a loop of thread attached to it with glue.
How to secure button loop patches to your outfit?
The loop is twisted around a button on a garment or uniform, creating a hanging patch.
When to pick button loop backing?
These patches are popular in scouting uniforms. They are awarded as meritorious badges for accomplishment of goals set in scouting.
8. Magnetic Backing

Magnetic Backing on Custom Patch
In this type of patch backing, a small but strong magnet is enclosed between the patch and the backing.
How to secure magnetic backing patches to your outfit?
An oppositely charged magnet is put on the other side of the garment and the patch with the magnet is placed on it. This does not need any sewing, heating, or using pins.
When to pick magnetic backing patches?
Pick this option when you want your patches to have a cool novelty factor!
Another question we frequently get is:
What type of materials work best with different backing options?
Here is a snapshot to help you pick the right backing type

We hope that we were able to clear most of your queries regarding backing options for your custom patches. If you have more questions, please feel free to reach us at sales@gumtoo.sg Our Product Specialists will be happy to assist you.